Tuesday, February 10, 2009

Irises - My first love in the garden


I've lived and traveled all over the U.S. and some in Europe and as I traveled first North of Montgomery, Al, (40 years ago) I saw Irises in bloom. I was SMITTEN! I started collecting iris rhizomes and each time we moved, I would dig them all up and and take them to the new home. That was from Birmingham to Chicago, to New Jersey (2 moves) back to Chicago, then to Charlotte, NC and from there back to Mobile. I had some beautiful blooms during those days--entered Iris shows and came home with some ribbons.


I have not had much success with Irises here in Mobile. I believe the soil is too acid. But, it doesn't stop me from trying. I have them planted all over this place. There are bearded ones, native iris, water iris and african iris and probably some others growing here.


My friend owns one of our area's "Treasured Forest" and I shared some of the water irises for his pond. They naturalized and are beautiful.


I spent today applying bonemeal to the irises and other bulb plants.
I also ordered new garden flags from https://www.justforfunflags.com . A large selection of flags and no shipping charge.
~~~~~~~~~~~~~~~~~~~~~~~~~~~~~~~~~~~~~~~~~~~~~~~~~~~~~~


Sunday, February 8, 2009

Time to Rose

Things to do in February:

Time to prune, clean up your rose beds, apply organics, and start a spray program.

Organics to consider to replenish the beds are:

4-5 cups well-composted manure
2 cups cottonseed meal
3-4 cups alfalfa meal or pellets
1-2 cups Milorganite
1-2 cups fish meal
Any combination or all of them will give your garden a kick start. Be sure to water well after applying.
Apply Epsom Salt once a month during blooming season, starting April.
Renew your mulch around the roses. Oak leaves are good. Mulch them, if you can, with a mower.
Be sure to spray with a fungicide after you prune and resolve to stick to a spray program this year.

________________________________________________________

Well, the best laid plans of mice and men...
Got myself all dressed up for going to church. Got in the car, turned the key, and click??? Nothing. Yesterday I got in the car to go water the plants at the church and after putting the key in the ignition, I looked in the tray to be sure the church key was there. It wasn't. I went looking for the key all over the house and never did find it, so I canceled going. However, I forgot to go back and removed the car key from the ignition. Thus the dead battery. (I did finally find the key in a jacket.)

In my "dressed up" clothes, I went to open the green house door for ventilation and the next thing I knew, I was busy applying bone meal to the irises and lilies.~~~~~

Saturday, February 7, 2009

Ed has several blackberry bushes started for anyone who would like to have one. April--you expressed that you wanted one. Come on over and get it soon! They have the biggest, tastiest fruit--make great cobblers!


He still has a collard patch that hasn't been touched yet. If anyone has a taste for some, please let me know. We'll happily share.


The past two days have been good for getting out and cleaning up some of the cold damage. I've had to cut back burned ferns. Some time was spent tidying up the work bench in the greenhouse, and I dragged the poinsettias out and placed in the flower bed in front of the greenhouse.

Friday, February 6, 2009

North Mobile Garden Society Garden Tour

May 9, 2009, North Mobile Garden Society will sponsor a Garden Tour. My yard will be on the tour. Be sure you get a ticket and enjoy the beautiful yards that will be open for you. Azalea Trail Maids will be a highlight in each yard.

I will occasionally share a recipe with you. Here is one that think you will really like:

Chicken Via Veneto
From the kitchen of Marilyn Jones
Category: Meat Servings: 4-6
-------------------------------------------------------------
INGREDIENTS
1 Chicken fryer - cut up
1 slice of center cut ham- cut in small squares
1 can tomatoes
1 can cheddar cheese soup
1 large onion - cut in chunks
1/2-1 teaspoon Basil
1/2 stick of butter
INSTRUCTIONS
Flour the chicken pieces and brown lightly in the butter. Remove from the pan and brown the ham. Add the chicken back to the pan with the ham. Add the cheese soup, tomatoes and onion. Sprinkle with basil, salt and pepper to taste. Cover and simmer until chicken is cooked through. Stir often. Serve over mashed potatoes or rice.

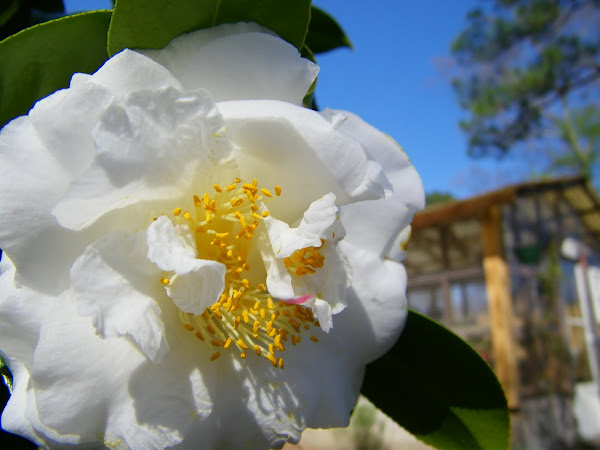
Camellias

Here are a few of the Camellias that are blooming in my yard...


Pink Perfection


Purple Dawn


Thursday, February 5, 2009

Bromeliads -- My Favorites

Billbergia nutans


Aechmea fasciata


The "Urn Plant"


I have one blooming now.
Aechmea Nuduclis 'Mary Hyde'


I enjoy growing Bromeliads--they are so easy! Of course, it's better if you have a little greenhouse with a diffused light, such as a shade cloth or opaque fiberglass roof.


Some Bromeliads may be planted directly into the ground if protected in extreme cold.
Billbergia is one that adapts well.
To grow:
Occasionally, feed with a little diluted (1/2 strength) orchid recommended fertilizer in the "cup" of the plant and a little on the soil. The soil must be one that drains well. Always keep a little water in the "cup" of the plant. Pour out the water to protect from freeze, if weather is too cold. Protect from direct sun. It's pretty much that easy.


____________________________________________________


Wednesday, February 4, 2009


How to Propagate Poinsettia
By eHow Home & Garden Editor

I Did This

Poinsettias are generally temporary houseplants purchased before the holidays in full bloom and discarded after New Year's Day. They can be kept and induced to bloom again the following winter, but this is a difficult process. An easier method of ensuring a blooming poinsettia for the next holiday season is propagation of the plant. You must take some special steps because of the sticky latex inside the stems.


Difficulty: Moderately Easy

Things You’ll Need: Rooting hormone powder

Step1 Keep the plant alive through the winter and into spring - don't let it get too dry. The best time to begin propagation is in the Spring.

Step2 Cut a three- to six-inch section of the stem way from the end of a branch. Remove the bottom set of leaves from the cutting. If you intend to keep the parent plant, mist the area where you took the cutting with water to help prevent excessive sap from leaking out of the plant.

Step3 Dip the tip of the cutting in a jar of water to help prevent sap from leaking out of the stem.

Step4 Fill a three-inch pot with a mixture of sand and perlite. Then add a half inch layer of sand to the top of the mixture. The sand helps prevent the propagation from rotting.

Step5 Add some rooting hormone powder to the tip of the poinsettia cutting and insert it into the potting mixture. Water the propagation well at first. After the first watering, water only when the potting mix dries out. Too much water can cause stem rot.

Step6 Wait about two months for the poinsettia propagation to take root. When new growth appears, treat the poinsettia as a mature plant.